TL;DR

Get travel and outdoor gear delivered free — and shop member deals
- Fast, free delivery on millions of items
- Access to Prime Big Deal Days deals on October 6–7
- Prime Video, Amazon Music and more included
Spooky outdoor Halloween decorations work best when you choose a clear mood, build around one focal point, and use height and lighting to make the scene readable from the street. Check product instructions and local rules, secure props for wind, protect electrical connections from rain, and keep paths, steps, exits, and sightlines clear.
A front yard can feel haunted with three pumpkins, one crooked silhouette, and a porch light turned an unsettling shade of green. You don’t need a truckload of inflatables or a fog machine; a display with a clear focal point often reads better from the sidewalk than dozens of scattered props.
This guide shows you how to plan spooky outdoor Halloween decorations for different spaces and budgets, from a narrow apartment entrance to a wide lawn. You’ll learn how to choose a mood, make simple materials look eerie, light the scene, and keep visitors safe when the nights turn wet, windy, and busy.
The useful key facts and most important aspects are easy to remember: choose a theme, layer the scene, and protect the path. Decide whether the display should feel playful, eerie, gothic, or family-friendly before you buy anything. That one choice helps every pumpkin, prop, and light belong in the same story.
Choose one mood—eerie, playful, gothic, or family-friendly—before buying props.
Build around a single focal point and use low, mid-height, and tall decorations to add depth.
Aim lights at the display while keeping steps and paths visible and avoiding glare into windows or roads.
Use outdoor-suitable products, follow their anchoring and electrical instructions, and clear exits and walkways.
Check local rules for shared spaces, sidewalk clearance, noise, lights, and inflatables.
Choose a theme that makes your yard feel haunted, not cluttered
Spooky outdoor Halloween decorations look more convincing when you choose one mood and let it guide the whole display. A theme gives your yard a visual story: a graveyard, a witch’s garden, a friendly pumpkin patch, or a shadowy haunted porch. If a prop doesn’t support that story, leave it in the storage box.
Start by deciding whether the scene should feel eerie, playful, gothic, or welcoming to young trick-or-treaters. For a family-friendly setup, use smiling pumpkins, soft orange light, and a silly skeleton waving from the porch. For a more unsettling look, swap in bare branches, a tilted headstone, and a single cool spotlight. The same yard can tell two very different stories with only a few changes.
A focal point is the anchor of the display. It might be a cluster of carved pumpkins, a tall figure beside the front door, or a small graveyard at the end of the lawn. Place your strongest visual there, then use smaller props to lead the eye toward it, like stepping stones that guide a visitor through a story.
Pick the mood before the props. A clear theme makes a modest display feel intentional, while unrelated decorations can make even a large yard feel jumbled.
For example, if you choose a haunted garden, gather a few dark planters, a branchy silhouette, and one pumpkin with a crooked grin. A plastic pirate, a cartoon ghost, and a blood-red light might all be fun on their own, but together they pull the scene in three directions. Let the theme do the editing for you.
As an affiliate, we earn on qualifying purchases.
Make a small yard look fuller with height and layers
Spooky outdoor Halloween decorations can make a small yard feel bigger when you vary height instead of spreading props across every inch. Combine low details at ground level, a few objects around waist height, and one taller silhouette near a wall, tree, or porch. This layered arrangement creates depth, much like scenery on a small theater stage.
Use the space you already have. A narrow entry might need only three pumpkins near the steps, a paper or weather-suitable silhouette in a window, and a lantern beside the door. In a compact yard, a single taller figure can draw the eye upward while a string of small lights marks the edge of a planting bed. You get a rich scene without crowding the walkway.
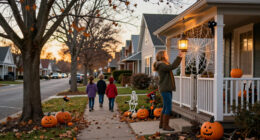
Think about how your setup reads from the sidewalk, not just from your front window. Tiny skulls and delicate cobwebs can disappear in the dark, while a large black cat silhouette remains easy to recognize from across the street. Check the scene in daylight too: the display should feel composed before the lights come on, not like a pile of props waiting for nightfall.
Try this simple layering plan before you buy anything:
- Choose one focal point, such as a pumpkin cluster or a porch figure.
- Add two or three ground-level details, like leaves, a small lantern, or a low sign.
- Place one mid-height prop on a porch chair, planter, or sturdy table.
- Finish with a tall shape, such as a doorway silhouette or a figure secured near a wall.
For example, a renter with a small shared landing could arrange two pumpkins, a battery lantern, and a removable window silhouette. That simple vertical composition feels more like a scene than a row of decorations—and it leaves the entrance open.
Use lighting to turn familiar props into spooky outdoor Halloween scenery
Spooky outdoor Halloween decorations become more dramatic when you use light to shape what people notice first. A warm orange bulb makes pumpkins glow; a cool blue or green spotlight can turn ordinary branches into crooked shadows. Aim the beam at the display, not into a neighbor’s window or the eyes of passing drivers.
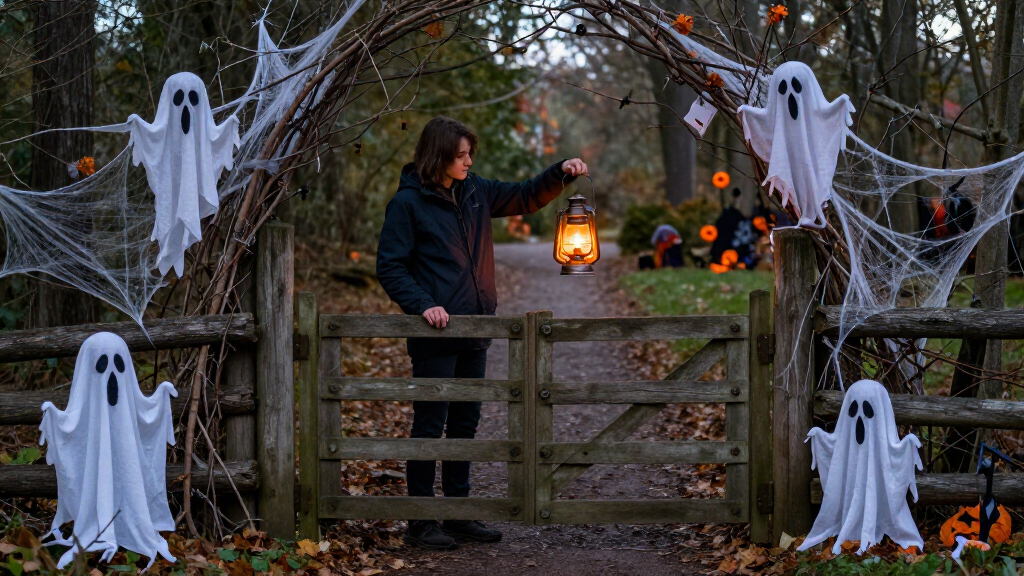
Start with one or two lights rather than flooding the yard. Put a low spotlight behind a plastic skeleton to throw its shadow onto a fence, or place a lantern near a cluster of pumpkins so their carved faces glow from below. Flickering effects can add an old-candle feel without an open flame. LED options also use less energy than many traditional bulbs, though you should still follow the product’s outdoor-use instructions.
Light the route as well as the props. Visitors need to see steps, the edge of a path, and the place where they’ll reach for candy. A dim corner may look eerie in a photo, but it can hide a trip hazard in real life. If children visit, keep an adult close to the walkway and supervise them around steps, cords, props, and any water features; decorations never replace active supervision or other drowning-prevention steps around pools and ponds.
Here’s a practical comparison for a small front yard:
| Lighting choice | Best for | Watch for |
|---|---|---|
| Warm LED lantern | Welcoming pumpkin displays | Place it where it won’t block the path |
| Colored spotlight | Silhouettes and bare branches | Aim away from roads and windows |
| Battery flicker light | Porches and enclosed props | Check batteries and product instructions |
For a real-world test, stand at the sidewalk after dark and ask someone to walk toward your door. If they can spot the pumpkins but can’t see the step, move a light. The best display lets the spooky shadows dance while the walking route stays clear.
Build a memorable display on a budget with household materials
You can create spooky outdoor Halloween decorations on a budget by turning inexpensive or reusable materials into clear shapes. Black cardboard, old sheets, fallen branches, jars, and last year’s pumpkins can supply much of the visual impact. The trick is to use a few large, readable pieces instead of buying many tiny items that vanish from the street.
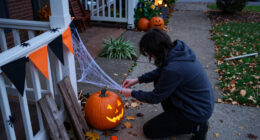
Cut a simple bat, crow, or crooked-house silhouette from suitable material and place it in a window or against a sheltered wall. Use clean jars with battery tea lights as porch lanterns, or gather branches in a stable planter to suggest a dead tree. If you use fabric, keep it away from heat and open flames, and choose a spot where it won’t trail across a walkway or snag on visitors’ clothing.
Natural materials bring texture: crisp leaves rustle, branches make jagged shadows, and pumpkins add warm color. But weather changes the plan. Wet leaves can become slippery, cardboard can soften in rain, and lightweight fabric can take off in a gust. Use materials suited to the location and forecast, and bring delicate pieces indoors when rain or strong wind is expected.
Try this three-part DIY scene: set a reused planter near the porch, add a few stable branches, and hang two large paper bats on a protected wall behind it. Place a pumpkin at the base and aim a small outdoor-rated light upward. One short setup tells a coherent story, takes little storage space, and can be refreshed next year with a new silhouette.
Upcycling also helps you avoid buying props for a single night. Keep the durable pieces—lanterns, reusable silhouettes, and sturdy containers—and replace only the items that wear out. A storage box with labeled bags for lights and small props saves time next October and keeps cords from turning into a tangled nest.
Keep visitors, pets, and your decorations safer in bad weather
Safe spooky outdoor Halloween decorations leave clear routes, use products rated for their location, and stay anchored when wind or rain arrives. A dramatic display isn’t worth a fall on a hidden step or a loose prop blowing into the street. Walk your setup as if you were arriving after dark with a child in one hand and a candy bag in the other.
Read product instructions for outdoor ratings, anchoring, inflation, and recommended clearances. Indoor-only lights and props don’t belong in wet weather. Keep electrical connections protected from rain as their instructions direct, use outdoor-rated equipment, and position cords where feet, wheels, and paws won’t catch them. Avoid open flames near dry leaves, fabric, paper, or inflatable decorations.
Inflatables and lightweight tombstones need a plan for wind. Use the supplied stakes and tethers where appropriate, add only manufacturer-approved anchoring, and place items away from sidewalks, driveways, and overhead lines. Check them after a gusty night. A plastic gravestone that looked solid at noon can shift into the walkway before trick-or-treaters arrive.
Make a quick safety pass before switching on the display:
- Clear steps, paths, exits, and accessible routes.
- Keep props stable and away from places where clothing can snag.
- Protect outdoor electrical connections according to product instructions.
- Remove or secure decorations if weather threatens to move them.
- Keep children and pets supervised around cords, props, candles, and pools or ponds.
For example, if your dog tends to chew dangling cords, put lights out of reach or choose battery-powered decorations designed for the setting. If a child is nervous around sudden motion, skip the jumping ghoul near the front gate and keep the more startling prop farther from the public path. People respond differently to noise, motion, and graphic scenes, so a display visible from the sidewalk should suit a wider audience.
Check placement rules before your display spills beyond your property
Spooky outdoor Halloween decorations should stay within the space you’re allowed to use and should not block public or shared access. A prop on your lawn is different from one extending across a sidewalk, shared apartment landing, or fire exit. Check local rules and any building or homeowners’ association guidance before setting up lights, loud effects, inflatables, or oversized pieces.
Shared spaces call for a lighter touch. If you live in an apartment, a removable door decoration and a small battery lantern may work better than a large prop on the landing. Keep the path to the stairs and exit clear, and ask property management before attaching anything to doors, railings, or exterior walls. A decoration that looks harmless in daylight can become an obstacle when residents come home with groceries at night.
Noise and brightness affect neighbors, too. Motion-triggered sound can startle a visitor—and keep nearby households awake if it repeats all evening. Set timers where available, angle lights away from windows, and test the volume from the sidewalk. If someone nearby has a sleeping baby, a night-shift schedule, or a sensitive pet, a quiet shadowy display may be more welcome than a chorus of shrieks.
Think about theft and damage as part of placement. Keep small valuable props close to the house, use removable fasteners that won’t damage shared surfaces, and store electronic pieces inside when you’re away. A simple photo of your layout can help you put everything back after bad weather or a busy evening.
For instance, a homeowner with a narrow sidewalk can place a graveyard scene several feet back on the lawn rather than lining tombstones along the public route. The display stays visible, visitors keep moving safely, and nobody has to step around a prop to reach the next house.
Set up at the right time and make next year easier
Put up spooky outdoor Halloween decorations when you can check the forecast, test the lights, and secure each prop without rushing. There’s no universal best date: climate, materials, and neighborhood plans all matter. A fabric-heavy setup may need a later start than weather-resistant silhouettes, while an inflatable may need daily checks if your area gets strong gusts.
Set a clear schedule for installation and removal. First, test lights and inspect cords before they go outside. Next, place and anchor large props, then add smaller details and lights. After the first night, look at the scene from the street again; a quick adjustment to a spotlight or pumpkin position can make the whole arrangement read more clearly.
When the holiday passes, dry decorations before storage and follow the maker’s guidance for cleaning and packing them. Coil cords loosely, remove batteries from devices you’ll store for months, and keep small accessories in labeled bags. If rain soaked a fabric prop, let it dry fully before putting it away so next season doesn’t begin with a musty smell.
Reusable pieces offer a practical tradeoff: they may take a little more care to pack, but they reduce repeat purchases and make next year’s setup faster. A family might keep two silhouettes, a set of outdoor-rated lights, and a sturdy lantern, then change the theme with fresh pumpkins or a different color. That small collection can feel new without filling the garage with one-season decorations.
Take one photo from the sidewalk before you dismantle the display. It captures what worked, where the cords ran, and which props stayed secure in the weather. Next October, you’ll have a simple starting point instead of trying to remember why the skeleton looked better by the maple tree.
Frequently Asked Questions
What are the best spooky outdoor Halloween decorations for a small yard?
Choose one focal point, such as a pumpkin cluster or a single tall silhouette, then add a few smaller props at different heights. A low light aimed at a fence or wall can make the scene feel larger without using more floor space. Keep the walkway open.
How can I make my front yard look haunted on a budget?
Use reusable materials such as branches, old planters, simple silhouettes, and jars with battery lights. Make two or three large shapes that read from the sidewalk instead of buying many small decorations. Check that DIY materials can handle the weather where you place them.
How do I keep Halloween inflatables or lightweight props from blowing away?
Follow the manufacturer’s anchoring instructions and use the supplied stakes and tethers in their intended locations. Place lightweight props away from roads and walkways, then check them after windy weather. Bring items inside if the forecast exceeds their stated limits.
Are outdoor Halloween decorations waterproof?
Not all decorations are waterproof or suitable for outdoor use. Check the product label and instructions for its weather rating, and keep indoor-only lights and props out of rain. Protect electrical connections exactly as the manufacturer directs, and bring delicate DIY pieces inside during bad weather.
How can I light a Halloween display without creating a fire or electrical hazard?
Use lighting rated for the location, keep cords out of walking routes, and follow instructions for outdoor electrical connections. Battery-powered flicker lights can give a candle-like effect without an open flame. Keep any flame away from fabric, paper, dry leaves, and inflatables, and make sure visitors can still see steps.
Conclusion
Make the scene tell one story, then keep the route through it safe. A few layered props, a carefully aimed light, and secure placement can make a small yard feel like a haunted stage without crowding the people who come to see it.
Before the first knock at the door, take one last walk from the sidewalk to your entrance. If the shadows look spooky and every step stays clear, your display is ready to welcome the night.
Fall Picks
fall essentials
As an affiliate, we earn on qualifying purchases.